As you know, the best gift is considered to be the one made with your own hands. One of such options will be a volumetric applique.
Such a product does not require the purchase of expensive materials and a lot of time. The whole family can work on it, thanks to which household members will be able to show their imagination and realize their creative abilities.
It is worth involving children in creating the decoration, who will certainly get unforgettable impressions from this activity. The applique can be used both for a present and for decorating your own home.
We have selected the most interesting crafts that you can make with your own hands from paper for the New Year 2025. These simple and original methods are ideal for use at home.
Paper applique Dragon - symbol of 2025
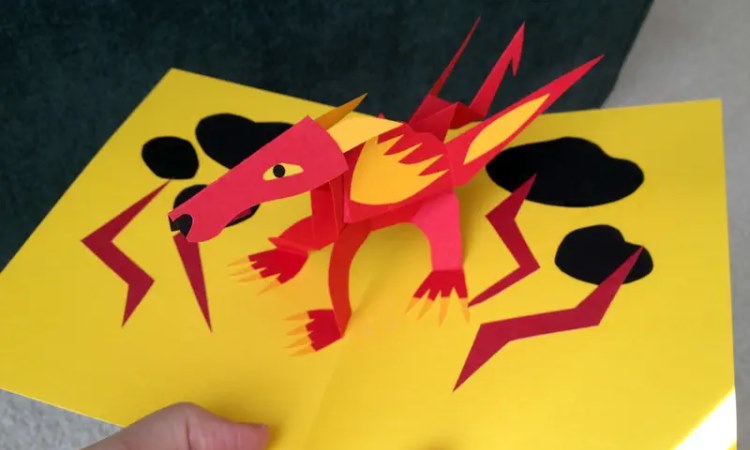
This option will be the most relevant in 2025. Children will definitely like such an expressive craft.
To make a symbol of the New Year 2025 out of paper, you need to have:
- multi-colored leaves (shiny ones are fine);
- cardboard;
- paints;
- felt-tip pens;
- scissors;
- adhesive composition.
Having found an interesting template with a green dragon on the Internet, you need to cut it out, then attach it to the back of the colored leaves and trace it. The resulting parts should be attached to the background area (blue or purple will be the most expressive).
The wings and back are painted with felt-tip pens and paints. Small snowdrifts can be depicted around the dragon using white putty. If the picture is made for a gift, a pleasant congratulation is transferred to it.
Dressed up toy
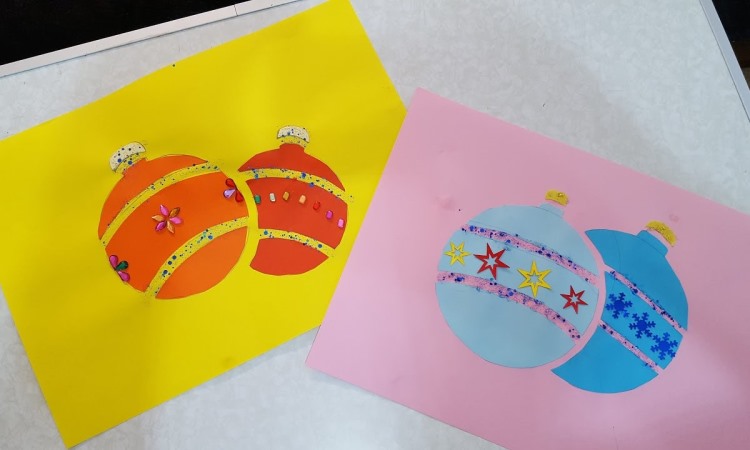
Even preschool children can do this kind of work. For the composition you will need:
- a toy drawn on colored cardboard (in the form of a ball or other shape);
- finely chopped woolen threads (green, blue, red, yellow, etc.);
- PVA glue;
- napkin.
The adhesive substance is evenly distributed on the figure. Thread particles are applied on top (a certain pattern can be formed). The remaining glue is carefully removed with a napkin.
Christmas tree made of sticks
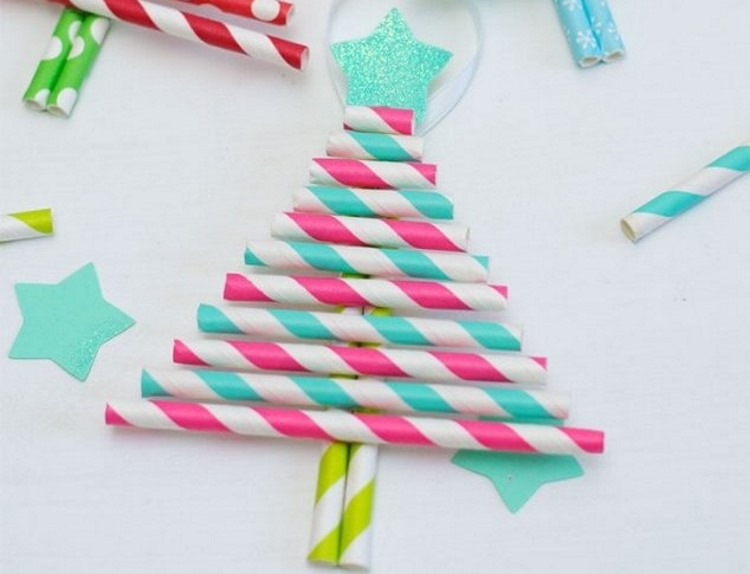
Another simple and attractive idea. It is necessary to have:
- brightly colored paper (beautiful wrappers will also work);
- cardboard;
- with a stick;
- buttons;
- with an asterisk;
- with office glue.
Small paper elements are rolled into small rolls. The excess is cut off. A stick is fixed to the cardboard, which will serve as a trunk. Rolls are glued to it, forming a Christmas tree. The improvised tree is decorated with buttons. A star is glued to the top.
New Year's applique from corrugated paper for children
Using such a base, you can create many interesting options. Below is a master class that allows you to correctly make a postcard and other thematic compositions.
Volumetric greeting card
Components of the craft:
- a piece of cardboard of the desired shade;
- green corrugated paper;
- pencil;
- glue;
- decor (tinsel, beads).
The cardboard blank is folded in half. Five stripes are depicted inside (a short upper stripe, a long lower stripe). The corrugated paper is cut into stripes (slightly longer than the stripes) and "trimmed", forming a thick fringe.
Each fragment is glued to the lines. The existing decor is used. The accessory is complemented with congratulatory words.
DIY applique for New Year – 3D snowflake
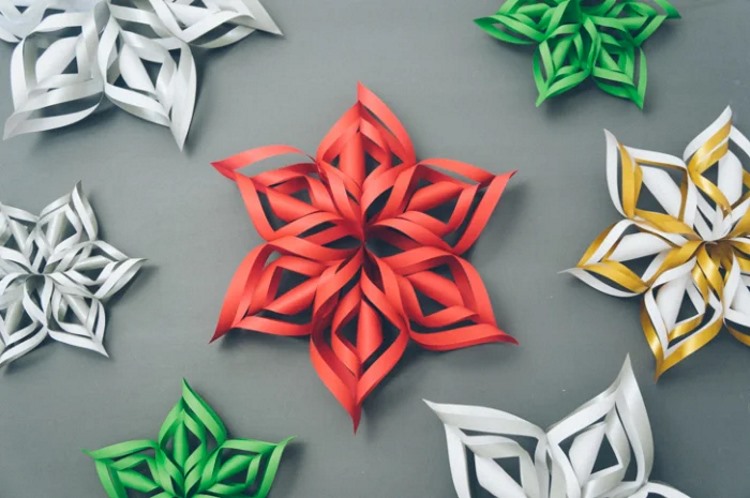
You will need:
- a piece of blue paper (A4 format);
- simple pencil;
- adhesive agent.
The leaflet is divided into six identical squares, which are cut out. One of these elements is folded diagonally and six cuts are made, leaving approximately equal distances between them.
Having unfolded the paper sheet, connect the two lower strips and glue them together. When the glue dries, do the same with the next row of strips. All the remaining strips are glued together, alternating sides.
From the remaining squares, make five more fragments, after which you begin to assemble the snowflake. To do this, glue the bases of all the parts.
Winter holiday
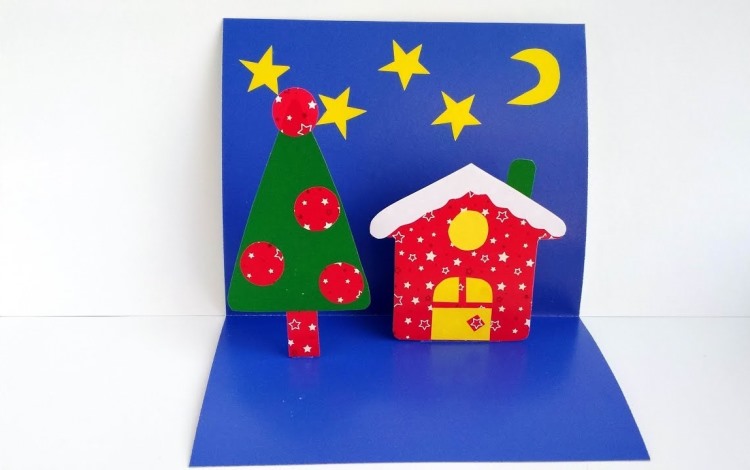
Use the following materials:
- stencil with the symbol of the year and a Christmas tree;
- cardboard;
- multi-colored corrugated paper;
- sequins;
- cotton wool;
- napkins;
- PVA.
Corrugated paper, napkins are cut into small pieces and twisted. The resulting lumps are attached to the parts of the picture coated with glue. The product is decorated with sequins and pieces of cotton wool depicting a snowball. It can also be supplemented with an inscription corresponding to the holiday.
Snowman
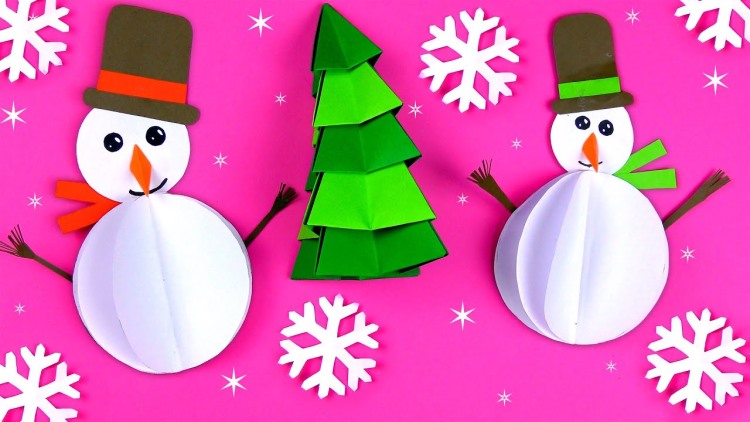
Accessory components:
- printed template with a picture of a snowman;
- white and colored paper;
- cardboard;
- paper snowflakes;
- black marker;
- glue.
Further steps to create your own New Year's applique:
- Cut out a large circle from the template base. Fold the white sheet of paper in four, apply the template and cut out four similar circles.
- All the resulting circles are folded in half. Having smeared the outer side of one of the elements with glue, glue it to the back of the other part. The same is done with the remaining circles.
- After making the volumetric ball, it is glued to cardboard of the preferred color.
- Form a middle circle from the template. Work with it in the same way as with the previous part.
- The smallest cut-out template is attached on top of the large medium circle.
- The cut out dark hat is glued to the top of the small circle.
- Fix the orange nose and scarf.
- Use a black marker to draw eyes, mouth, arms, and buttons.
- Decorate empty spaces with snowflakes (white, silver).
The product will look much more interesting if you add a broom to the character depicted on it. Small twigs are suitable for this.
Winter forest
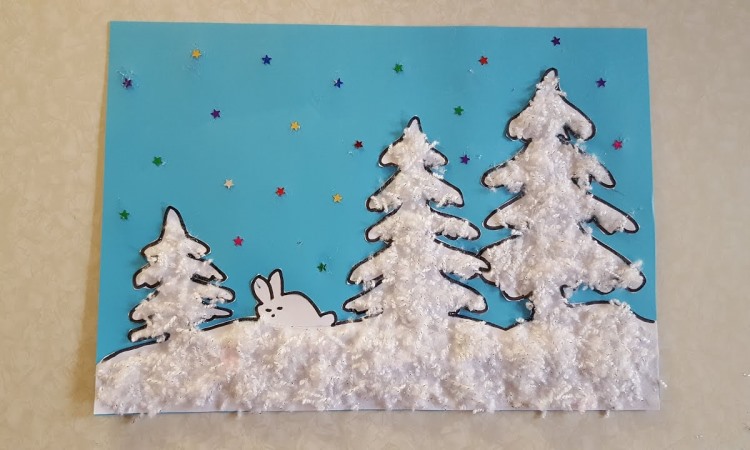
This mini-picture looks truly fabulous. To work on it, you need to prepare a blue cardboard blank, a set of colored paper, white yarn, a black felt-tip pen, small multi-colored stars, and adhesive.
Master class on creating a craft:
- First, you need to select and print a template image of a winter forest, which will include fir trees, snowdrifts, and a bunny.
- Next, you will need to outline the contours with a black marker, separate them and glue them to the blue base.
- At the next stage, the white yarn is finely chopped.
- Having coated the template images with glue, attach yarn to them.
- After drying, remove excess particles.
The finished composition is decorated with stars.
Felt picture with Christmas tree and Santa Claus
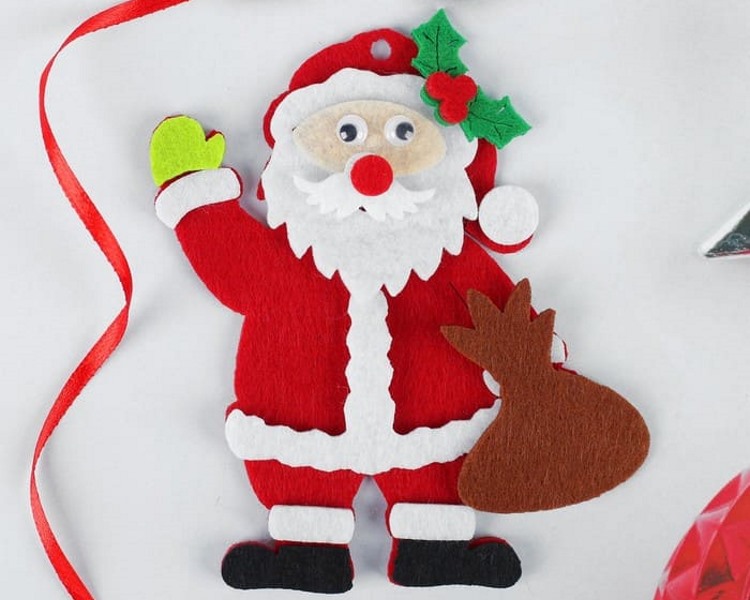
If you decide to make this spectacular craft, prepare:
- for the Christmas tree – multi-colored felt 1-2 mm thick, small buttons;
- for Santa Claus – felt of various colors, synthetic padding, small black beads for eyes.
You will also need a sheet of cardboard (preferably a dark color), snowflakes for decoration, a simple pencil, and a glue.
First you need to choose a Santa Claus template. The cut-out character is applied to the felt and outlined with a pencil. A beige piece is needed for the face, white is suitable for the beard and mittens, red is suitable for the clothes, hat and nose, brown or black is suitable for the boots. The cut-out parts are glued to the cardboard. Eyes are made from beads, and the beard and snow are made from synthetic padding.
The tree is made of green felt (using a stencil or your own design), then glued to a cardboard base. Multi-colored fragments and buttons are attached to the tree as toys. The top is decorated with a bright felt star. The unfilled space is decorated with delicate snowflakes.
Spectacular garlands
This version of the applique for the New Year is always in demand. It can be placed anywhere - on a window, wall, above the door and even outside the room. To create a beautiful banner, you can use a variety of methods.
Flashlights
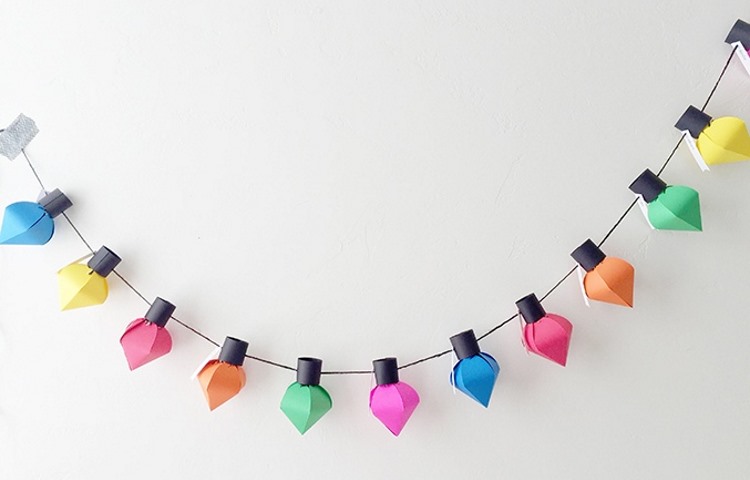
Using a template image, cut out the required number of lanterns. The paper products are glued together and strung on a strong long thread. You can also do it differently. For each lantern, prepare two parts, painted in one color or another.
Their dimensions:
- 180*120 mm;
- 180*100 mm.
The larger piece is folded in half and parallel cuts are made on the fold side (it is necessary to leave about 1 cm to the edge). The smaller strip will be the tube, the edges of which are fastened.
The resulting "accordion" is wrapped around each of the tubes. The areas of contact are sealed. Having made the required number of lanterns, they begin stringing them on a thread.
Fans
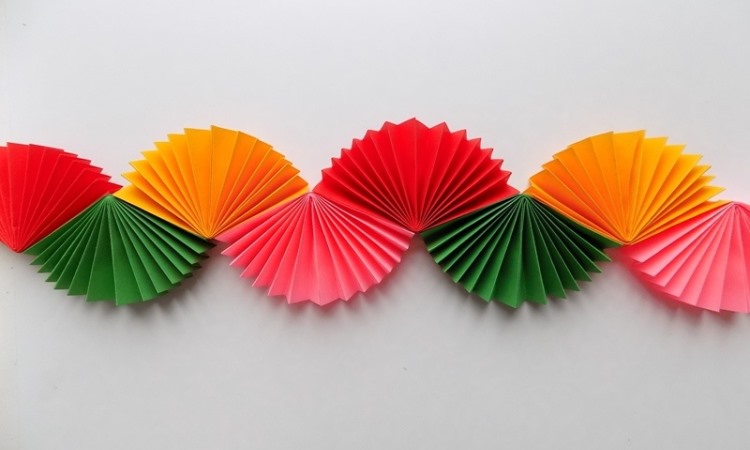
Across the entire width of the colored leaf, stripes are marked that are about 1 cm thick.Following them, form an “accordion”, which is then folded in half.
A lot of such elements (of the same or different shades) are prepared.
The two inner edges of each of the "fans" are connected with double-sided tape. To get a beautiful festive garland, all the parts are combined into one whole.
3D Garland
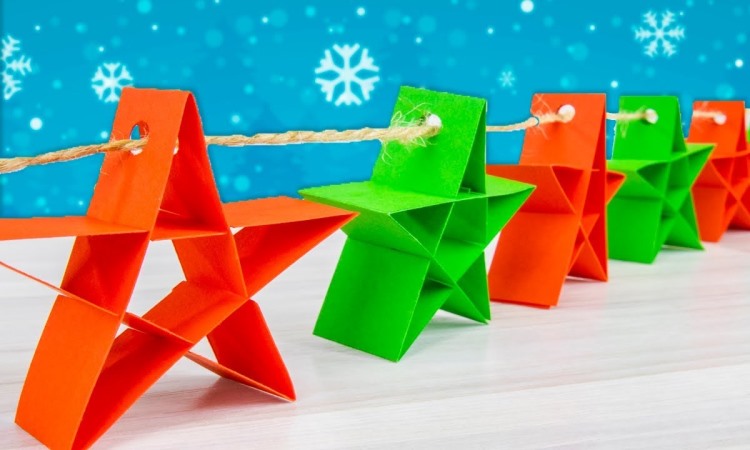
It's not difficult at all to make such a fashionable accessoryIt is enough to have leaves of various colors, adhesive composition and a base for subsequent hanging.
Having made circles with a diameter of about 5 cm (two for each figure), bend them in half. Grease the edge of one element and glue it to the other.
In addition to classic circles, other configurations that you like (hearts, butterflies, fruits, flowers) will also work. You can also make an applique in the form of an expressive symbol of the approaching 2025.
For hanging, select small strips, fold them in half and fix them on the back of the round structures. All that remains is to distribute the figures on the thread and begin the pleasant activity of decorating the house!









Оставить Комментарий