Christmas garlands are often used not only to decorate the tree. But they can be placed on the mantelpiece, hung on the windows or on the stairs. Using natural materials is so much fun because they can be collected in the forest or in the park while you are walking, and some of them you can find in your own attic. Having a new garland of evergreens is just one option, but nature has so much more to offer. All you need is imagination and creativity!

Even children can make DIY New Year's garlands from natural materials

Garlands made from natural materials are the best crafts for children, and the fact that such materials do not require financial investment is another advantage, isn't it?
You can use anything that is available - dry leaves, pine cones, pine branches, dry twigs, red berries, chestnuts, acorns, nuts, wood slices, etc. Any of these materials can be used not only to make garlands, but also to make beautiful Christmas wreaths, holiday table decorations, Christmas tree decor, chair decorations, window decorations, etc.
Every year, more and more people are inspired to create eco-friendly Christmas decorations themselves, and simple, rustic Christmas decor is becoming more popular than ever. If you haven’t tried these styles before, maybe this holiday is the perfect time to turn simple things like pine cones and acorns into fun home decor!
Step-by-step instructions for making a garland of pine cones

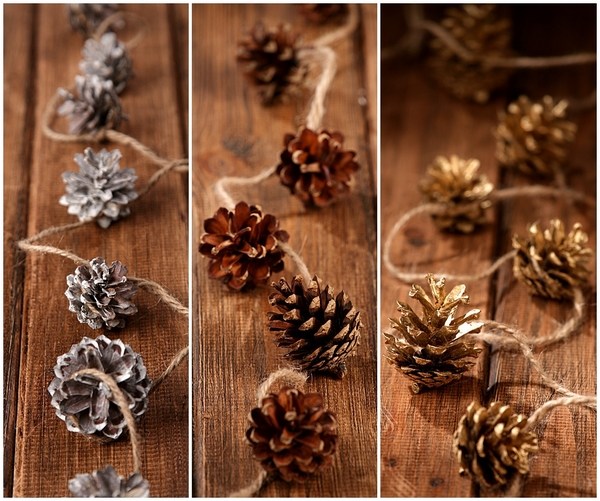
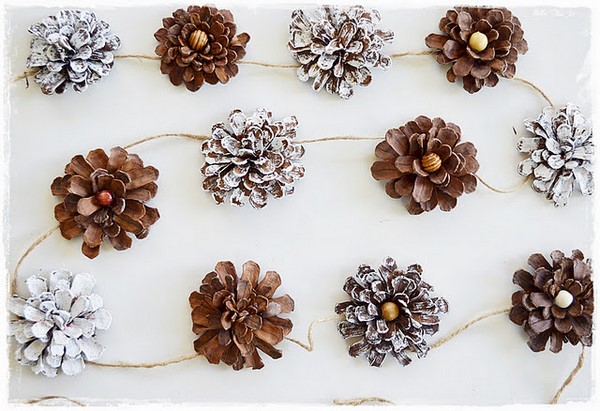
Pine cones, which can be collected in a nearby forest or park area, are often used for various children's crafts, and they can easily be turned into a beautiful decoration for the home for the New Year. It is best if you have pine cones of the same size. You can choose a simple design or paint the cones gold, silver or any other color that will match the color scheme of your home. If you choose to paint the pine cone garland, this procedure should be done in advance so that the paint dries well before the craft.
Materials:
- pine cones;
- paint, spray or glitter;
- thick twine or wire (you can find these at any hardware store);
- scissors or nippers;
Instructions for making:
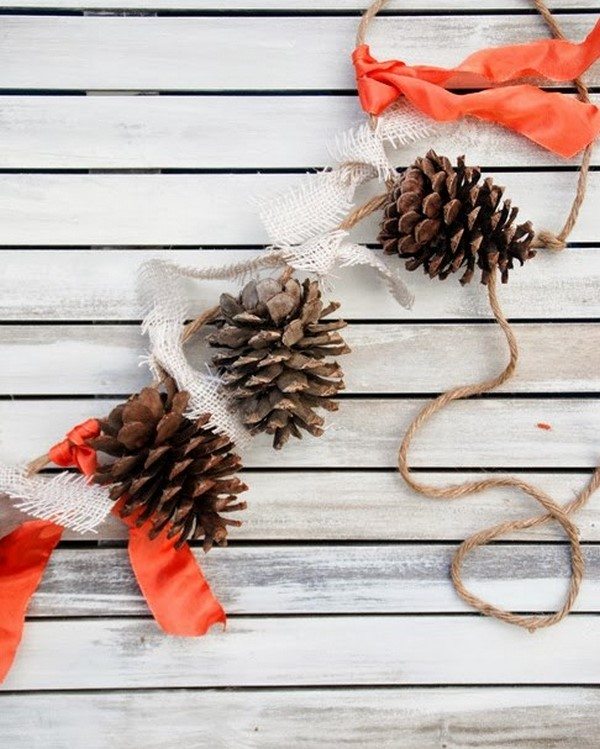
- Step 1. Measure the desired length of the future garland and cut the twine. Add some extra for attaching the decoration.
- Step 2: Cut pieces of twine (12-14 cm) or wire and tie to each pine cone.
- Step 3: Attach the pine cones to the main string of twine. To make the garland tighter, twist three cones together.
- Step 4. Continue tying the pine cones to the garland by twisting the wire or twine until you have filled the entire length. You can use a hot glue gun to attach the cones to the base. To do this, simply glue the cones together.
DIY New Year's Garland of Chestnuts

Chestnuts can be simply picked from a park in the fall. A chestnut garland will add rustic charm to your holiday decor. Since chestnuts are small, you may not have enough for the desired length of Christmas garland. This is not a problem, just look around your home. You can add beads, acorns, other nuts, dried fruits, cinnamon sticks, bay leaves, etc. It is a good idea to dry the chestnuts first. You can do this in a dehydrator or in the oven.
Materials:
- chestnuts (or any other nuts, such as walnuts);
- beads, dried fruits, cinnamon sticks - optional;
- paint or spray paint (optional);
- waxed twine (wire);
- Boer;
- large needle;
Instructions for making a chestnut garland with your own hands:
- Step 1: Measure the desired length of your garland and cut the heavy twine. Make sure to add extra length at each end to create a loop.
- Step 2: Drill holes in the chestnuts using a Dremel. Once you have drilled the chestnuts, set your oven to the lowest temperature, place the chestnuts on a baking sheet, and leave them in the oven for at least five hours. Remove them from the oven and let them dry for a few days – 2-7 days. Once they are dry, you can spray them with gold, silver, or any other color.
- Step 3: Use a large needle and thread the chestnuts onto a piece of waxed twine.
- Step 4: Continue until you have filled the entire length of the garland.
Step-by-step instructions for making a garland of acorns with your own hands

Acorn garland is another way to use natural materials and you can combine them in many ways. They are really cute, similar to chestnuts and pine cones, and they can be stored for a long time. After collecting acorns, they need to be dried immediately. You can use an oven or a dryer. Before stringing them on a garland, you can paint them and let them dry well before working. Acorns can be combined with other natural materials - nuts, dried fruits, etc.
Materials:
- acorns with caps;
- beads, dried fruits, cinnamon sticks (optional);
- acrylic paint (optional);
- thick thread, twine or yarn;
- Boer;
- large needle;
- glue gun
Instructions:
- Step 1. The cord or twine should be measured to the length of the future garland and additional allowances should be left so that the garland can be attached later.
- Step 2: Drill holes into the acorns with a drill or screw. Once you have drilled the acorns, set the oven to the lowest temperature, place them on a baking sheet, and leave them in the oven for an hour or two. Remove them from the oven and let them dry for a few days.
- Step 3: Check the acorn caps and use a glue gun to secure them if needed as the acorns tend to fall out of these caps. Once the acorns are dry, you can paint them with acrylic paint in gold/silver or any color you like.
- Step 4: Use a large needle to thread the acorns.
- Step 5: Continue until you have filled the entire length of the garland.
Check out the photos in the gallery for more inspiration!