
DIY Dragon from scrap materials
Materials:
- felt;
- paper, cardboard;
- yarn, threads;
- cotton wool;
- foil;
- salt dough.
Unusual materials are also suitable for the work. For example, a used light bulb, a toilet paper roll, plastic cups.
The color of the figurine or toy can be any. For example, light blue, turquoise, blue, khaki. Colors can be combined. There are no limits to imagination here.
The shade, material, decor, size and format of the figurine (keychain, toy, etc.) – these aspects depend on personal preferences, capabilities, skills, materials at hand and available tools.
Crafts from salt dough
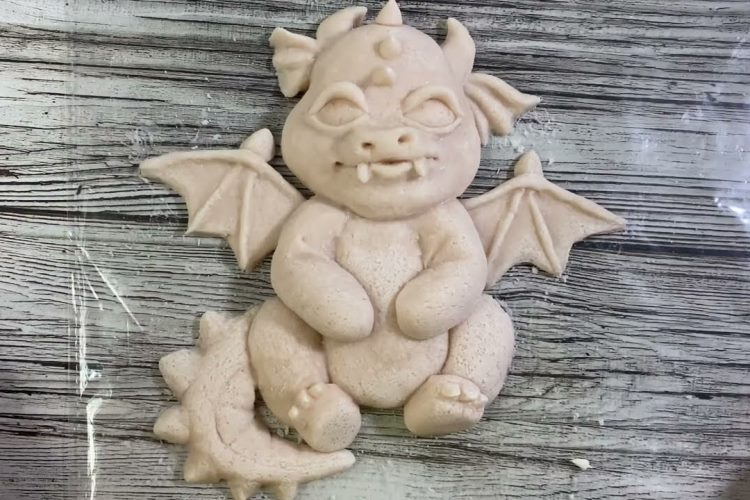
You can mold a dragon of any size from salt dough. Such a handicraft created with your own hands will become an original gift, Christmas tree decoration, talisman.
For the dough you will need to mix:
- 4 cups flour;
- 2 cups fine salt;
- 2 glasses of warm water.
First, combine salt and flour, then gradually pour in water. Stir. Once the dough is firm, knead it for 10 minutes. In the end, it should resemble plasticine and not stick to your hands. When ready, place the dough in a bag. This will prevent it from drying out. During the molding process, you can simply take the required amount from the bag.
Step-by-step technique on how to make a dragon with your own hands from dough:
- Form a foil blank in the shape of the future dragon. It is necessary to clearly highlight the head, body, tail.
- Roll out the dough. It should be an oval or a circle. The dough should not be too thin, otherwise it will tear.
- Wrap the foil blank with dough. The material should fit tightly. So that the shape of the dragon is visible. Bumps and unevenness should be smoothed out.
- Add details. Using small balls of dough, form a nose and eyebrows. Use your fingers to outline the chin, smile, and cheeks. Use a stack or any thin stick to highlight the nostrils, mouth, and draw the eyes. Mold the ears and glue them to the head. Add wings. Also mold the lower and upper legs from dough. Attach them to the body.
The finished figurine needs to be dried. On average, it will take about 7 days. Then paint it in the preferred colors. Then spray it with aerosol varnish.
Dragon from scrap materials

Several ways to make a dragon with your own hands involve working with old items or those that are at hand. So, Even a child can make a dragon out of a toilet paper roll. It will act as the body.
First, you need to paint the roll. Then cut out the missing elements from colored paper - head, eyes, ears, paws, tail, comb, wings. Glue them to the body. Finally, you can decorate the figure with glitter.
Another interesting option is a dragon made from several plastic cups.
Instructions:
- Make a small hole in the middle of the bottom of each glass. For example, using an awl.
- Place a stopper in each cup. This will prevent the cups from stacking one on top of the other. This could be a paper ball, a piece of light plasticine, or a small cardboard cylinder.
- Insert the cups one into another. Gather them on a strong thread, passing it through the holes in the bottom. The stoppers should also be pierced with a thread so that they do not fall out of the containers.
- Add eyes, ears, and a comb to the first cup, which represents the dragon's face. Glue on the tongue and nostrils. You can add bright glitter, stickers. For example, stars.
- Decorate the dragon with paper or satin ribbons. Colored or plain – as desired.
You can also make a dragon yourself from an old burnt-out light bulb. You will need to paint the glass with gouache or acrylic paints, and then draw a dragon's face on it. Decorate with glitter, beads, stickers and whatever you want. Tie a ribbon or a jute cord to the top. Such a toy can be hung on a Christmas tree or in a car.
You can use cotton wool and food foil for making it.
You will also need the following for this craft:
- cardboard;
- brush;
- stationery knife;
- sisal wire;
- glue gun;
- acrylic paints;
- PVA glue.
The first step is to prepare two foil blanks. The smaller one is for the head. The larger one is for the body. Glue the blanks together with hot glue. Then form the other parts from foil – the nose, paws, ears – and glue them to the body.
What to do next:
- use sisal wire to form the outline of the comb and attach it to the back and head;
- cut out wings from cardboard and glue them to the figure’s body;
- dilute the PVA with water, divide the cotton wool into small thin pieces and glue them onto the dragon in several layers;
- mark the ridge, nostrils, and eye sockets on the last layer of cotton wool - you can use thin sticks or modeling tools;
- leave the figure to dry;
- paint the dragon with acrylic paints, add highlights and sparkles.
After painting, the figure should be allowed to dry. Then the toy should be covered with a layer of PVA to fix the color and contours.
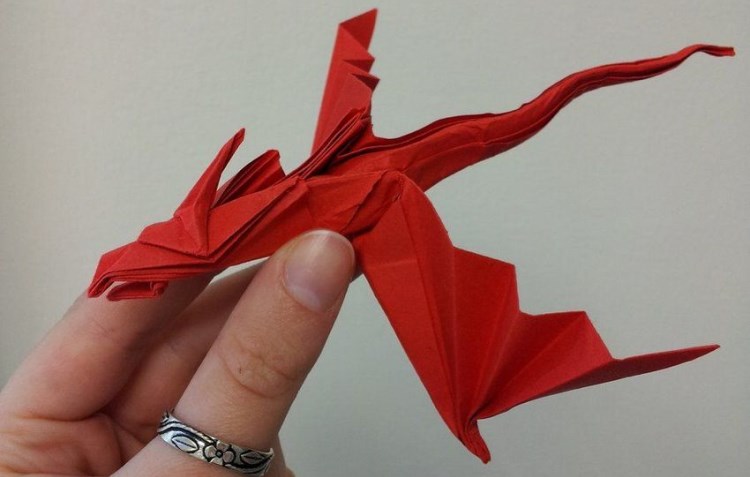
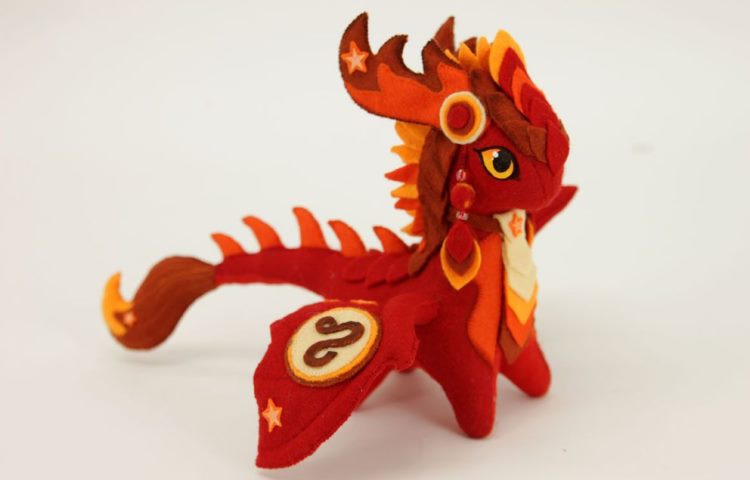
Felt dragon
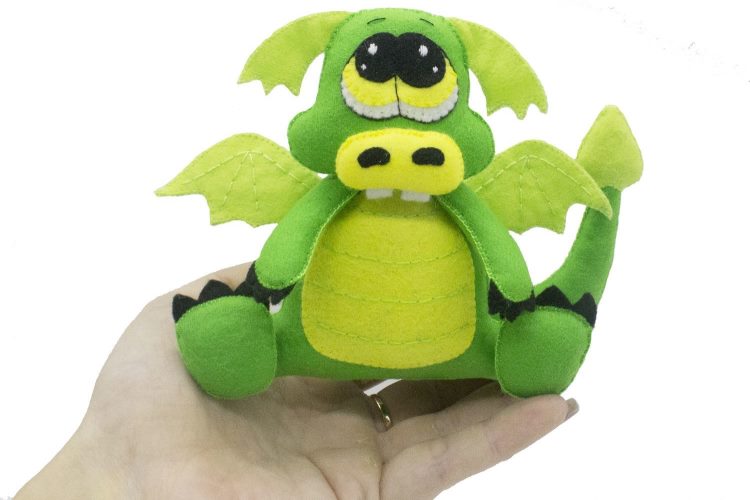
Felt is a soft material with a wide range of shades. It keeps its shape well and does not crumble. You don’t need any special skills to make a felt dragon with your own hands.
To make the craft you need to prepare:
- felt – 1-2 mm thick;
- glue gun;
- scissors;
- threads, needles;
- rhinestones, glitter, beads – for decoration;
- decorative cord or ribbon for hanging.
To make a dragon, you will need a template. You can draw it yourself or use a ready-made version. In the latter case, the pattern must be printed. Next, the template should be placed on felt, outlined with a thin marker or pencil. Then cut out the details along the contour - paws, body, tail, comb.
Next steps:
- Assembly. First, you need to hand or machine stitch the main parts of the dragon - the body, paws. Then add small elements - wings, eyes, ears. Small parts, such as eyes or horns, can be attached with a glue gun.
- Decoration. You can decorate the dragon with glitter. For example, sprinkle it on the wings or ears. You can make shiny scales from sequins. You can embroider the wings with bugles or beads.
A bright felt dragon is a great option for decorating a Christmas tree. The talisman can also be used as a car pendant.
Dragon Keychain
A small dragon keychain is easiest to make from felt. Any color will do. It depends on your wishes and imagination.
What you need to make it:
- felt;
- decor – beads, buttons, glitter, sequins;
- glue or hot glue gun;
- scissors;
- needle, thread to match the color of the material;
- holofiber.
Using a stencil, you will need to cut out the details of the future dragon from felt. You can draw the template yourself. Next, sew the elements, not forgetting to sew a ribbon or cord for hanging at the top. It is important to leave a small hole to fill the craft with holofiber for volume. Then sew again.
You can decorate the keychain in any way you like. For example, cover it with sequins or glitter. You can draw eyes and a smile with a marker, paints, or cut them out of felt separately and then glue them on with a hot glue gun.
DIY Pom Pom Dragon
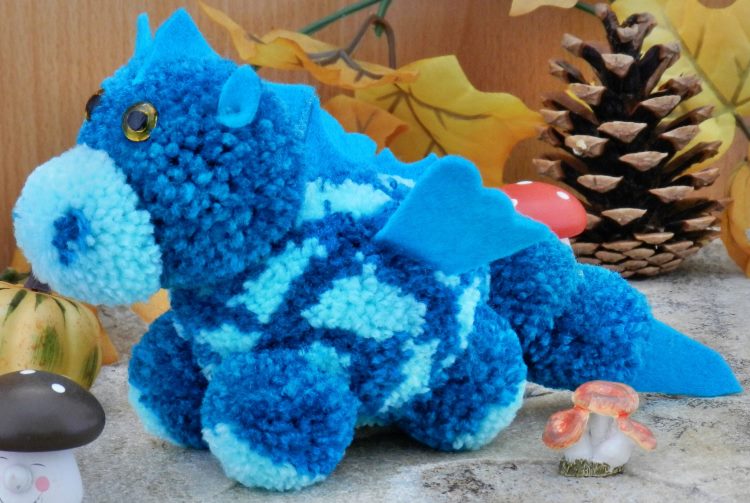
This version of the dragon will be fluffy and funny.. You can buy pompoms or make them yourself using cardboard templates. In this case, you will need to cut two circles out of cardboard. Cut out a smaller circle inside them.
Next, the templates will need to be cut on one side in the direction from the outer circle to the inner one. Then put the blanks together and wind yarn on them. The more yarn, the fluffier the pompom will be.
Finally, the wound yarn should be cut between the two blanks. Then thread a piece of thread between the templates and tighten tightly. Remove the blanks. Straighten the resulting bunch. The pompom is ready.
For the dragon you will need to do:
- 1 large pompom for the body;
- 2 smaller pom-poms for the face;
- 4 small pom-poms for paws;
- 2 small pompoms for the tail.
First, you need to prepare the muzzle. One pompom will serve as the head, and the second should be sewn approximately at the level of the nose. So that you get a convex muzzle. Then sew the blank to the body. Then attach the paws. Sew two pompoms together for the tail and also sew it to the body.
It is best to cut out the wings, ears, and comb from felt. Beads and buttons are suitable for the eyes. Small parts should be attached to the body last. They can be glued using a hot glue gun.
Toothless from cardboard
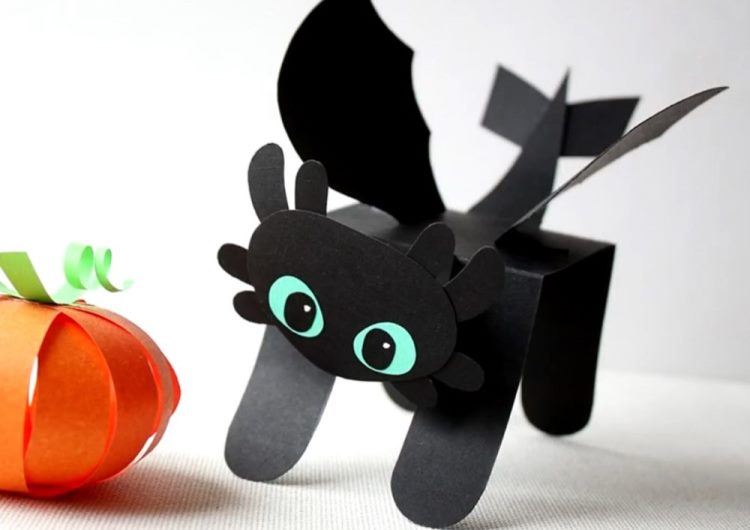
For the simplest version of making a cardboard Toothless you will need:
- Body. For this, you need to prepare a cone from black cardboard. The size depends on your preferences. To make a cone, you need to create a circle using a compass. Divide it into 4 equal parts. Form a cone from one of them. Glue the edge.
- Head. You can print a ready-made template or draw it yourself on cardboard. Then cut it out.
- Wings. Can be cut out of black paper.
- Paws. It is better to cut them out of thick black cardboard to maintain stability.
- Eyes. Cut out two small ovals from yellow paper. Draw small pupils in the center in black.
Once the parts are ready, you can start assembling. First, glue the eyes onto the head. Attach it to the top of the cone. Glue the wings to the back of the body. Attach the paws to the front. You can bend them a little at the top.
Finally, you can add accents in the form of white dots and thin stripes on the head, wings, paws. Gouache or a simple corrector will do.
DIY Plush Dragon Toy
Plush fabric is suitable for making a soft dragon. The texture of the material is very pleasant to the touch, the color range is varied. Such a toy can become an irreplaceable friend for a child or a reliable talisman for an adult.
Materials and tools:
- plush - several colors that match each other;
- a piece of cotton fabric;
- 2 beads for eyes;
- nylon threads, long needle;
- synthetic padding for filling the toy.
The toy is made according to a pattern. First of all, the contours of the parts must be carefully cut out of the fabric according to the template. Then sew all the small elements to the base and sew it together. Attach the dragon's comb to the seam along the back and stitch it.
Fill all the parts with padding polyester. Finally, sew the bead eyes and paws to the toy's body. Make a small bow from a cotton piece and decorate the dragon with it. The toy is ready.


Оставить Комментарий